Compile the MSeg Core Module from Source
This guide will show how to compile the MSeg core module from source on a 64 bit Ubuntu machine.
Note
It is strongly recommended to use the MSeg core module with Ubuntu 14.04, as it eases the installation process drastically. If this should be a problem, consider using a virtual machine like VirtualBox and install Ubuntu 14.04 there.
Preconditions
- Freshly installed Ubuntu 14.04.5 LTS x64 “trusty” [64-bit PC (AMD64) desktop image]
sudoprivileges- Approx. hard disk size required: 1 GiB (Make sure to have enough space if you want to install additional software like IDEs or MATLAB)
Setup Environment Variables and Installation Directories
Open a terminal ( Ctrl + Shift + T ) and set the needed environment variables and create the
installation directory.
# Add ARMARX_INSTALL_DIR to .bashrc
$ echo "export ARMARX_INSTALL_DIR=$HOME/armarx" >> ~/.bashrc
# Source .bashrc
$ source ~/.bashrc
# Add MSEG_INSTALL_DIR to .bashrc
$ echo "export MSEG_INSTALL_DIR=$ARMARX_INSTALL_DIR/MSeg" >> ~/.bashrc
# Source .bashrc
$ source ~/.bashrc
# Create ArmarX install directory
$ mkdir -p $ARMARX_INSTALL_DIR
Dependencies
In this step, all needed dependencies will be installed. Where repositories are available, they will be used. Otherwise, they will be compiled from source.
Standard Ubuntu Packages
Install the following packages:
$ sudo apt install astyle cmake cmake-qt-gui cppcheck curl doxygen \
freeglut3-dev g++ git gsl-bin ivy lcov libalglib-dev libboost-all-dev \
libcoin80-dev libcv-dev libcvaux-dev libdb5.1-dev libdc1394-22-dev \
libeigen3-dev libgraphviz-dev libgsl0-dev libgstreamer-plugins-base0.10-dev \
libhighgui-dev libjsoncpp-dev libnlopt-dev libopencv-dev libopencv-gpu-dev \
libopencv-photo-dev libopencv-stitching-dev libopencv-superres-dev \
libopencv-ts-dev libopencv-videostab-dev libpcre3-dev libqwt-dev \
libsoqt4-dev libsqlite3-dev libssl-dev libtinyxml-dev libv4l-dev mcpp \
mongodb openjdk-7-jdk python-argcomplete python-docutils python-psutil \
python-setuptools zeroc-ice35
Packages from H2T Package Server
Add the H2T key and install additional packages.
# Add H2T key and add repositories
$ curl https://packages.humanoids.kit.edu/h2t-key.pub | sudo apt-key add -
$ echo -e "deb http://packages.humanoids.kit.edu/trusty/main trusty main\ndeb http://packages.humanoids.kit.edu/trusty/testing trusty testing" | sudo tee /etc/apt/sources.list.d/armarx.list
# Update lists
$ sudo apt update
# Install additional packages
$ sudo apt install ivt ivtrecognition mmmcore simox
Install MMMTools from Source
MMMTools is used for the visualisation of motion data. Unfortunately, it is not available as binary and has to be compiled from source.
# Get source code
$ git clone https://gitlab.com/mastermotormap/mmmtools.git $ARMARX_INSTALL_DIR/mmmtools
# Go into the source folder of MMMTools
$ cd $ARMARX_INSTALL_DIR/mmmtools
# Create build directory and go into it
$ mkdir build && cd build
# Run CMake
$ cmake ..
# Compile. Use 'make -j4' to use 4 cores
$ make
Setup ArmarXCore
In this step, ArmarXCore will be compiled from source and setup. We start with fetching the source code and compiling it.
# Get source code
$ git clone https://gitlab.com/ArmarX/ArmarXCore $ARMARX_INSTALL_DIR/ArmarXCore
# Go to build directory
$ cd $ARMARX_INSTALL_DIR/ArmarXCore/build
# Run CMake
$ cmake ..
# Compile. Use 'make -j4' to use 4 cores
$ make
ArmarXCore should be compiled now. Now add the binary directory to $PATH to ease working with it.
$ echo "export PATH=\"$ARMARX_INSTALL_DIR/ArmarXCore/build/bin:\$PATH\"" >> ~/.bashrc
$ source ~/.bashrc
We also need to install the Python packages.
# Go into python scripts directory
$ cd $ARMARX_INSTALL_DIR/ArmarXCore/etc/python
# Run setup
$ python setup.py develop --user
With everything being setup, we can now start ArmarX. Config files needed later will be created then.
# Run armarx for the first time. You will be prompted to add a line to
# .bashrc for autocompletion. Accept with y
$ armarx
# Source .bashrc as indicated
$ source ~/.bashrc
# Run armarx again since the previous step just modified the .bashrc file
$ armarx start
The config file now got created. Run the following command and apply the changes below.
# Open config file
$ gedit ~/.armarx/default.cfg
Changes:
++ Ice.MessageSizeMax=10240
   Ice.Default.Locator=IceGrid/Locator:tcp -p 12454 -h localhost
   IceGrid.Registry.Client.Endpoints=tcp -p 12454

   ArmarX.MongoHost=localhost
   ArmarX.MongoPort=12455

   #Put your custom ArmarX Packages in this list, e.g. so that the gui can find their plugins.
-- ArmarX.AdditionalPackages=
++ ArmarX.AdditionalPackages=MSeg
Save and close the config file. Finally, restart ArmarX.
# Restart ArmarX
$ armarx reset
Setup ArmarXGui
We will now proceed to install the ArmarXGui. Again we start with fetching the source code and compiling it.
# Get source code
$ git clone https://gitlab.com/ArmarX/ArmarXGui $ARMARX_INSTALL_DIR/ArmarXGui
# Go to build directory
$ cd $ARMARX_INSTALL_DIR/ArmarXGui/build
# Run CMake
$ cmake ..
# Compile. Use 'make -j4' to use 4 cores
$ make
You should now be able start the GUI.
# Start ArmarX GUI
$ armarx gui
The GUI will now load and eventualy, a popup should appear.
- You may check the checkbox
Do not show again. - Push the
Open empty GUIbutton.
Close the GUI for now using the × button.
Setup the MSeg Core Module
In this step the MSeg core module will be compiled and setup.
Compile the MSeg Core Module
Once more, fetch the source code and compile.
# Get source code
$ git clone https://gitlab.com/h2t/kit-mseg/core.git $MSEG_INSTALL_DIR
# Go into the MSeg installation directory
$ cd $MSEG_INSTALL_DIR
# Get the most recent stable version
$ git checkout 1.1-stable
# Create the build folder and go into it
$ mkdir build && cd build
# Run cmake
$ cmake ..
# Compile. Use 'make -j4' to use 4 cores
$ make
Now that the project is compiled, we proceed to add the mseg* terminaltool to $PATH:
$ echo "export PATH=\"$MSEG_INSTALL_DIR/etc/scripts/:\$PATH\"" >> ~/.bashrc
$ source ~/.bashrc
We can now start the ArmarX GUI and MSeg. Firstly, make sure that ArmarX is running:
armarx status. If the output is similar to the output below, start ArmarX as indicated using
armarx start.
# An output similar to this is shown when 'armarx status' is called
# and ArmarX is not running:
Exception while initializing Ice:
Ice.ConnectionRefusedException:
Connection refused
IceGrid is not running
Try starting it with 'armarx start'
Launch the GUI: armarx gui. You can now use the MSeg GUI by clicking on Add Widget | MSeg.
Start the Core Module
When you open the MSeg GUI you should see a window similar to this:
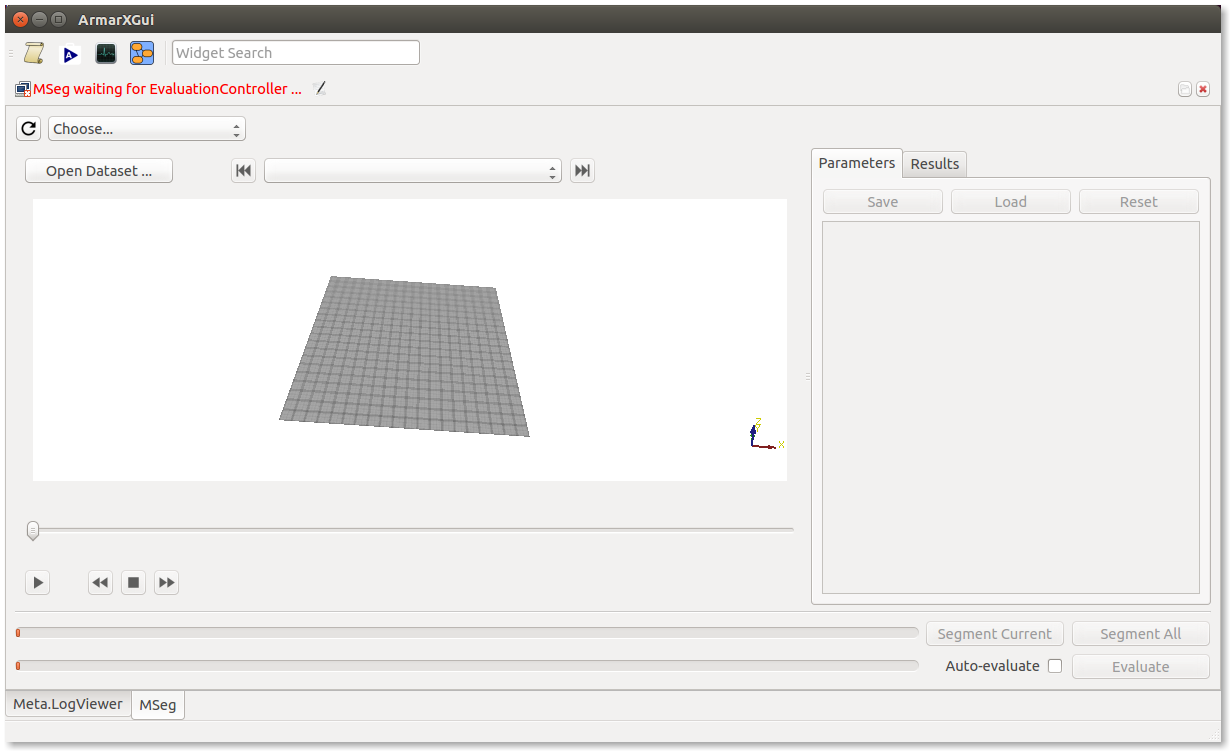
Note the red text which says:
MSeg waiting for EvaluationController and SegmentationController
Both the EvaluationController and the SegmentationController, as well as the DataExchange,
which is not listed here, are components that form the core module. In order for the GUI to work,
these components have to be started.
# Start the core module
$ mseg start
The components of the core module are now running. If you now head back to the MSeg GUI, you should see that the warning showed before disappeared.
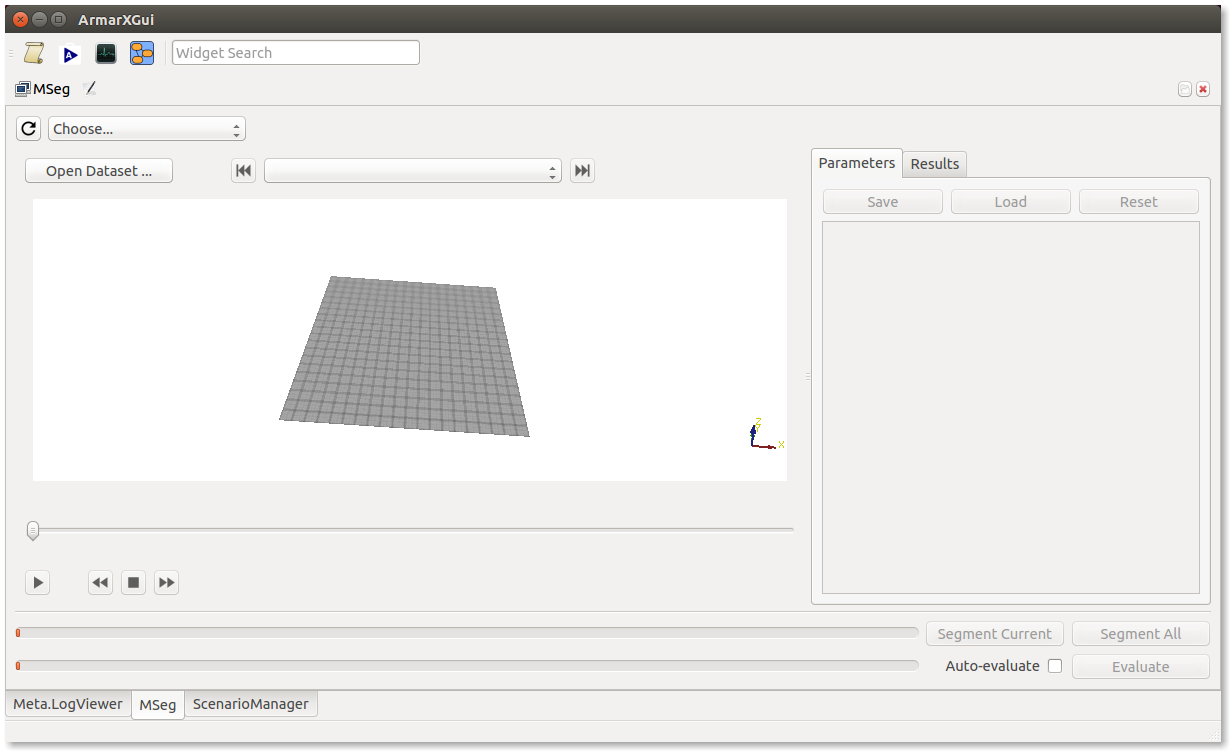
Remember to start these components every time you reboot your computer. Also, when a component
crashes, it may be required to restart them using mseg restart. You will be notified if components
need to be restarted by the red text as shown in the first graphic.
How to Proceed
With the core module being set up, you can now proceed to compile a PLI which is needed to offer an API to communicate with the core module in the programming language the motion segmentation algorithm is implemented in. Supported programming languages are C++, Python, Java and MATLAB.